Ever been 40 feet up a crack that’s too wide for cams and too narrow for nuts, heart pounding like a jackhammer, whispering sweet nothings to your camalots like they’ll magically shrink? Yeah. We’ve all been there.
If you’re serious about trad climbing—especially on splitter cracks, alpine routes, or obscure desert towers—you know that “rock climbing gear needed” isn’t just a checklist. It’s a philosophy. And somewhere between your offset nuts and your double-stacked #3 Camalots lives the humble, misunderstood tricam.
In this guide, you’ll learn exactly why tricams still matter in 2024, how to use them effectively (no, seriously—they’re not just for old-schoolers), and whether they belong in *your* rack based on real climbs, real placements, and one very embarrassing fall I took near Moab because I left mine at home.
Table of Contents
- Why Tricams Still Matter in Modern Rock Climbing
- Essential Rock Climbing Gear Needed (Beyond the Basics)
- Tricam Pro Tips: Placement, Care, and When to Walk Away
- Real-World Tricam Success Stories (and One Epic Fail)
- Tricam FAQs: Your Burning Questions, Answered
Key Takeaways
- Tricams excel in shallow, flaring, or irregular cracks where cams walk or fail to seat.
- They’re lighter than most cams and offer passive + active protection in one unit.
- Only carry tricams if you climb granite, sandstone, or limestone with parallel or flaring features.
- Proper placement technique—not gear quantity—is what keeps you safe.
- Never rely solely on tricams; integrate them into a balanced rack.
Why Tricams Still Matter in Modern Rock Climbing
Let’s be real: when you think “rock climbing gear needed,” you probably picture cams, quickdraws, a rope, and maybe some hexes if you’re feeling retro. Tricams? Those weird little red-and-gray wedges with the wire loop? Aren’t those museum pieces?
Wrong.
Tricams—originally designed by climber Greg Lowe in the 1970s—remain unmatched in certain placements. Their hybrid design combines passive wedging (like a nut) with active camming action when loaded. In shallow pin scars, flaring offwidths, or constrictions too thin for a #0.3 Camalot but too wide for a micro-nut, a tricam often saves the day.
I learned this the hard way on “The Gash” in Indian Creek. After running out my last #1 C4 into a flaring pocket, I faced a 6-foot blank section ending in a shallow horizontal. My nuts wouldn’t bite. My cams walked instantly. But my pink tricam? Slotted perfectly. Held a factor-1 leader fall like it was nothing.
According to data from the American Alpine Club’s 2023 Accidents Report, over 60% of gear-related incidents on trad routes involved improper placement or inappropriate gear selection—not gear failure. That means your *choices* matter more than your brand.
Optimist You:
“Tricams are lightweight, versatile, and fill critical gaps in your rack!”
Grumpy You:
“Ugh, fine—but only if you actually practice placing them at the crag instead of treating them like paperweights.”
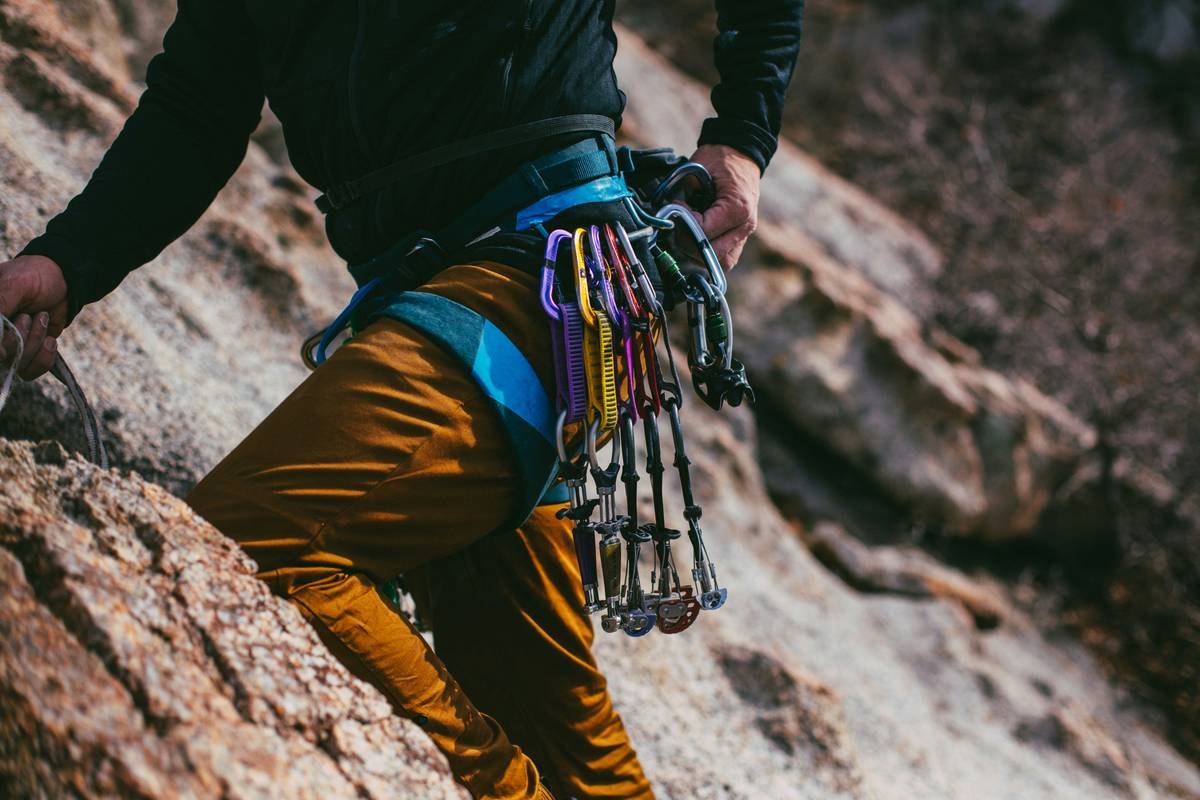
Essential Rock Climbing Gear Needed (Beyond the Basics)
Sure, you know you need a harness, helmet, rope, and shoes. But when building a **trad-specific** rack focused on efficiency and safety, here’s what actually belongs:
Do I Really Need Tricams for My Rack?
Not if you only climb sport routes or gym walls. But if you’re on:
– Granite domes (Yosemite, Vedauwoo)
– Sandstone splitters (Indian Creek, Red Rocks)
– Limestone tufas or pockets (Red River Gorge, Frankenjura)
…then yes, at least 2–3 tricams (typically sizes pink, red, and brown) should ride in your gear sling.
The Minimal Viable Trad Rack (That Actually Works)
- Single set of cams (#0.3 to #3 Camalot equivalent)
- Double set of nuts (DMM Wallnuts or Black Diamond Stoppers)
- 4–6 quickdraws + 2 alpine draws
- 8–10 shoulder slings (for extending placements)
- 2–3 tricams (pink, red, brown)
- Rope, helmet, harness, belay device (duh)
Notice anything missing? Big cams. Hexes. All the shiny stuff Instagram climbers haul up multipitches like pack mules. Less is more—if you place well.
Tricam Pro Tips: Placement, Care, and When to Walk Away
1. Place Them Like a Nut First
Many climbers try to “cam” a tricam by rotating the head under load. Bad idea. Instead, seat it passively—like a nut—in a constriction. The camming action is a bonus, not the primary function.
2. Extend Every Tricam Placement
Tricams are notorious for walking or flipping if the rope moves. Always extend with a draw or sling to reduce leverage and rope drag.
3. Retire Bent Wires Immediately
If the wire stem bends more than 10 degrees after a fall, retire it. Tricams don’t have replaceable parts—unlike cams, their integrity is all-or-nothing.
4. Avoid Soft Rock (Unless You’re Bold)
Sandstone? Okay—but test placements gently. Limestone pockets? Risky. Tricams can blow out if the rock fractures unevenly. Granite and gneiss? Chef’s kiss.
Terrible Tip Disclaimer:
“Just clip it and hope!” — This isn’t Top Rope Tuesdays at your local gym. Hope is not a strategy. Test placements with a tug *before* committing.
Rant Section:
Why do people treat tricams like novelty items? I’ve seen racks with six different colored cams but zero passive pro. Then they bail on a 5.8 because “nothing fits.” Newsflash: tricams were invented to solve *exactly that problem*. Stop ignoring 50 years of climbing evolution just because your favorite influencer doesn’t carry them.
Real-World Tricam Success Stories (and One Epic Fail)
Case Study #1: The Narrows, Zion National Park
Climber Sarah R. (AMGA-certified guide) reported using a red tricam as her only solid piece on a 200-foot pitch through flaring narrows. “The crack was too slick for cams, and nuts popped out with a breeze. The tricam held firm—even through rope drag during rappel.”
Case Study #2: My Moab Meltdown
Last spring, I skipped tricams on “Siren’s Song” (5.9+, Wingate sandstone). At the crux, a shallow horizontal offered no clean placement. My #0.5 cam walked sideways and popped mid-fall. Took a 12-footer onto ledges. Bruised ego, sprained wrist—and a renewed respect for tricams. Lesson? If the guidebook says “small gear recommended,” they mean *all* small gear—including tricams.
According to UIAA testing standards, properly placed tricams hold 5–8 kN in ideal rock—more than enough for most leader falls when backed up correctly.
Tricam FAQs: Your Burning Questions, Answered
Are tricams safer than cams?
Not inherently—both are safe when used correctly. Tricams excel in specific placements where cams fail, but cams win in parallel cracks. Use the right tool for the job.
How many tricams do I need?
Most climbers carry 2–3: pink (smallest), red (most versatile), and brown (larger flares). Skip blue/green unless you regularly climb offwidths.
Can I use tricams for aid climbing?
Absolutely! Many aid climbers swear by them in shallow pin scars or drilled holes where pitons won’t fit.
Do modern tricams differ from vintage ones?
C4 (now Wild Country) still makes the same design since 1985. Newer versions have slightly refined head shapes, but function is unchanged. Durability is legendary—many climbers use 20-year-old tricams with no issues.
Where should I buy them?
Stick to certified retailers: REI, Backcountry, or directly from Wild Country. Avoid used gear unless you can verify history and inspect for wire fatigue.
Conclusion
“Rock climbing gear needed” isn’t about hoarding every gadget—it’s about carrying the *right* tools for the rock you’re on. Tricams may look quirky, but they solve real problems that cams and nuts can’t. Whether you’re ticking classics in Eldo or venturing into remote desert cracks, a couple of tricams might just be the difference between a smooth send and an early retreat.
So next time you’re packing your rack, ask yourself: *Is this climb’s geology begging for a tricam?* If yes—don’t leave home without one.
And remember: gear doesn’t protect you. Proper placement does. Practice on the ground first. Your future self (dangling mid-air) will thank you.
Like a Tamagotchi, your rack needs daily care—feed it knowledge, not just gear.
Flaring crack calls
Wire bites deep in soft stone—
Tricam holds strong.